How do I obtain a FinCEN ID?

Complete the following steps to obtain your FinCEN Identifier.

Create an account with Login.gov

1. Go to https://fincenid.fincen.gov/landing. Click on “Sign in or Create an Account with LOGIN.GOV” and then click on Create an Account.

FinCEN ID Landing page

2. Click “Sign in with LOGIN.GOV”. You must enter a unique email address for each user you are registering that needs a BOI identifier.

Login.gov login

3. Click “Create an account” and enter your email address. You must enter a unique email address for each user you are registering that needs a BOI identifier.

Create account

4. You will receive an email at the address you provided from Login.gov with the subject “Confirm your email”. Click on the link in the email to establish a password.

Add password

Set up 2 Methods of Authentication

5. Set up an authentication method (Authentication App, Text Message, Back up Code, Security Key or Government Employee ID).

Choose authentication method

6. Note that you will be prompted to return to above screen to set up a second method of authentication.

Authentication complete

Enter Your Information and Receive ID

7. Once authentication methods have been confirmed, you can then complete the application for your FinCEN ID. Enter your name (first and last), date of birth, address and upload a form of identification (State-issued Driver’s License, State/Local/Tribe-issued ID, U.S. passport or Foreign passport).

FinCEN application

8. Once successfully submitted, you will be taken to your Submission Receipt. Download a copy of the identifier submission and/or copy your FinCEN ID.

FinCEN submission receipt

How do I follow up on client signatures?

From your online portal, you can follow up with your clients and send mobile-enabled magic links for signature.

Select the Document

1. Log in to your online portal and visit the Outstanding Items section. Be sure you are on the E-SIGN tab which displays all e-sign eligible documents.

2. Select the documents that you would like to send.

3. Click the “EMAIL(1) SELECTED DOCUMENTS” link.

Select Signer & Send a Message

1. A pop-up window will appear when you click the “EMAIL SELECTED DOCUMENTS” link. Select the signer who needs the magic link by checking the box next to their name entering their email address.

2. Add a personalized message to your client and then click “Submit”.

3. If you would like to create an account for the signer, select the “Create User Account” checkbox. With an account, your client will automatically receive magic links in the future. (This is an optional feature for you to use when and if it is appropriate.)

Finally, your client will receive a single magic-link by email. Once the link is clicked, a mobile-friendly page appears that enables your client to sign the documents with a finger. It is not required for your client to log in to our website.

How do I sign documents on my mobile device?

1. Click on the magic link in the email.

2. With your phone in the horizontal of landscape orientation (as shown), continue with the e-sign process. E-sign will guide you through each step and signing opportunity.

3. When you are done reviewing and signing the document, complete the process by clicking “Finish”.

Our attorneys will then review the signed documents and send you an acknowledgement of receipt.

How do I upload my photo ID?

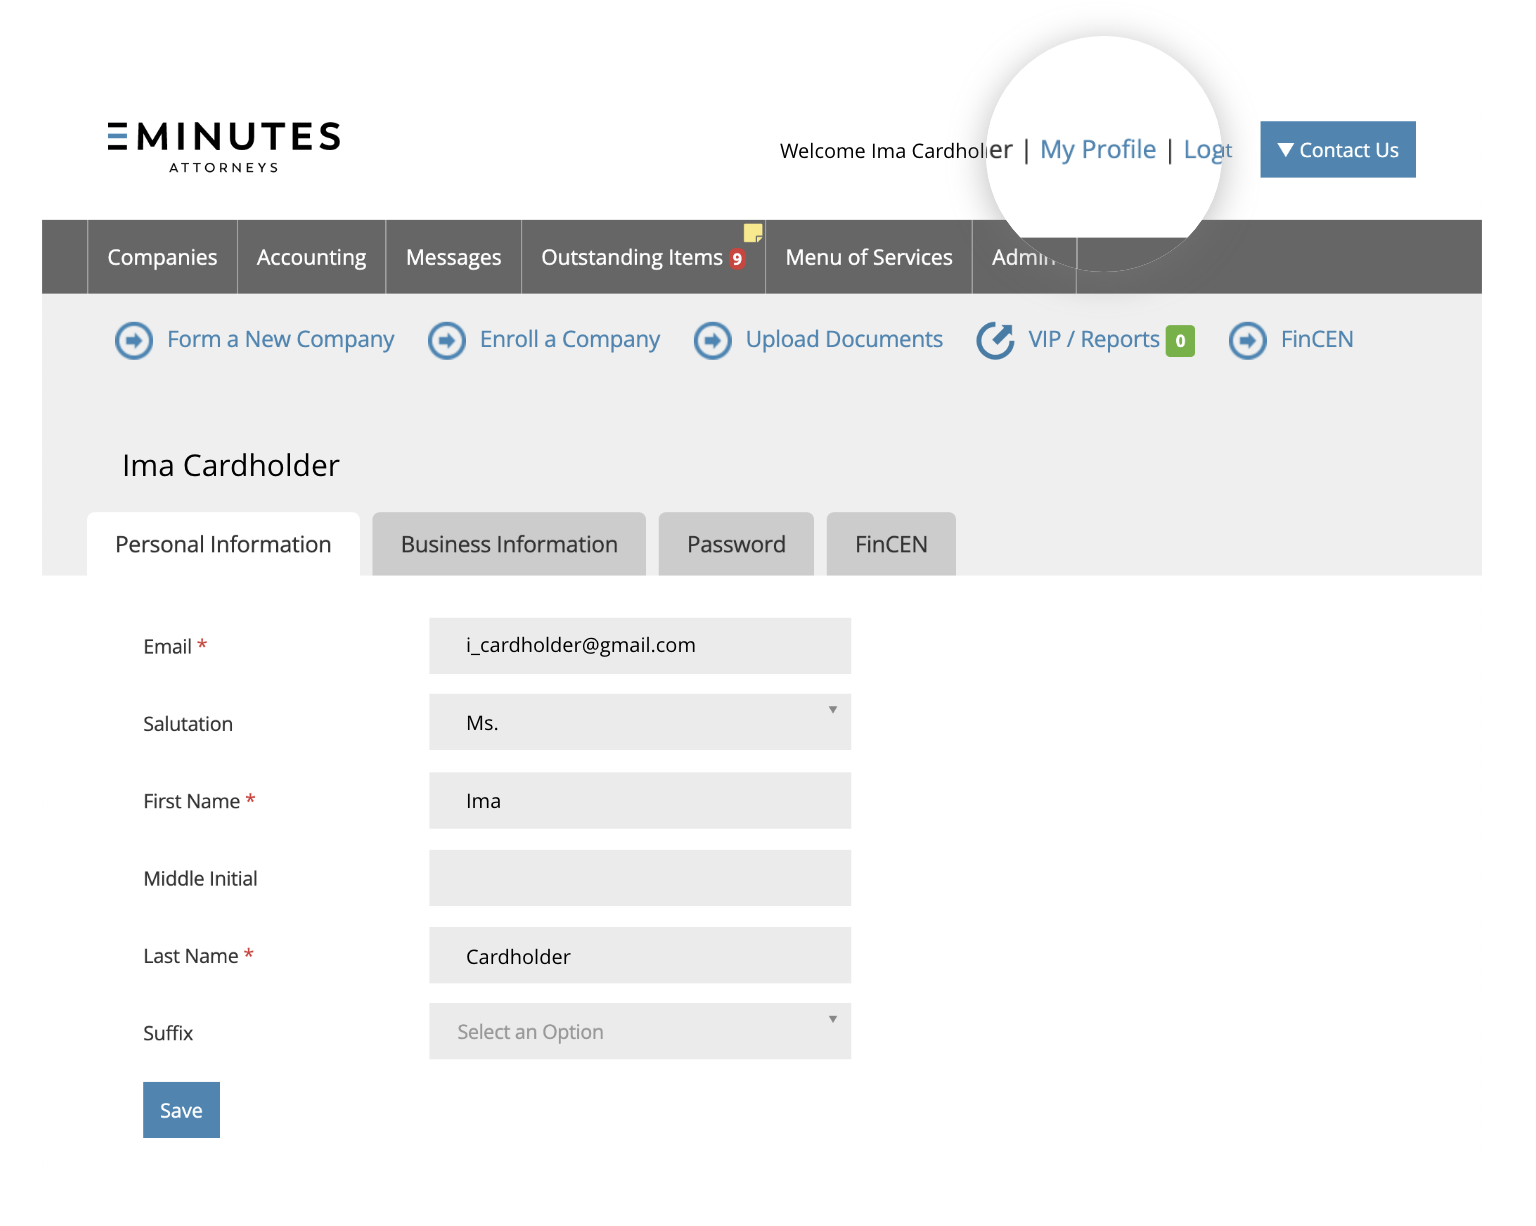
1. Log in to your online portal, and click on “My Profile” in the upper right hand corner.

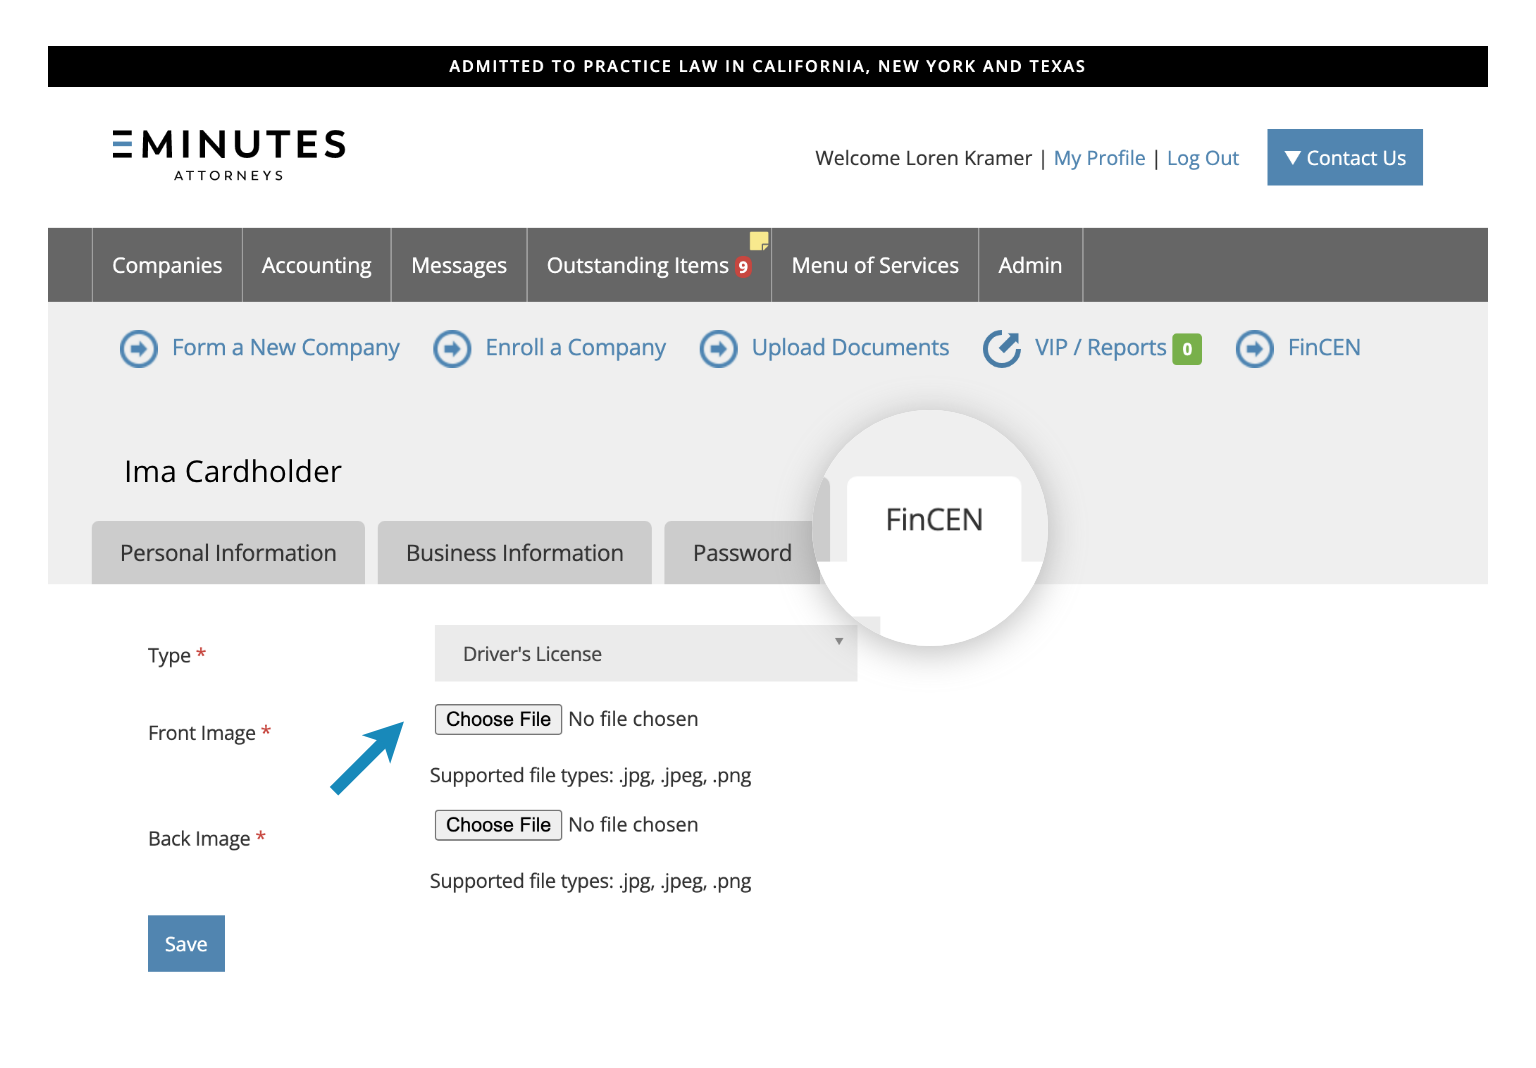
2. Next, click on the FinCen tab and upload an image of the front and back of your driver’s license. Once you have done so, click “Save”.

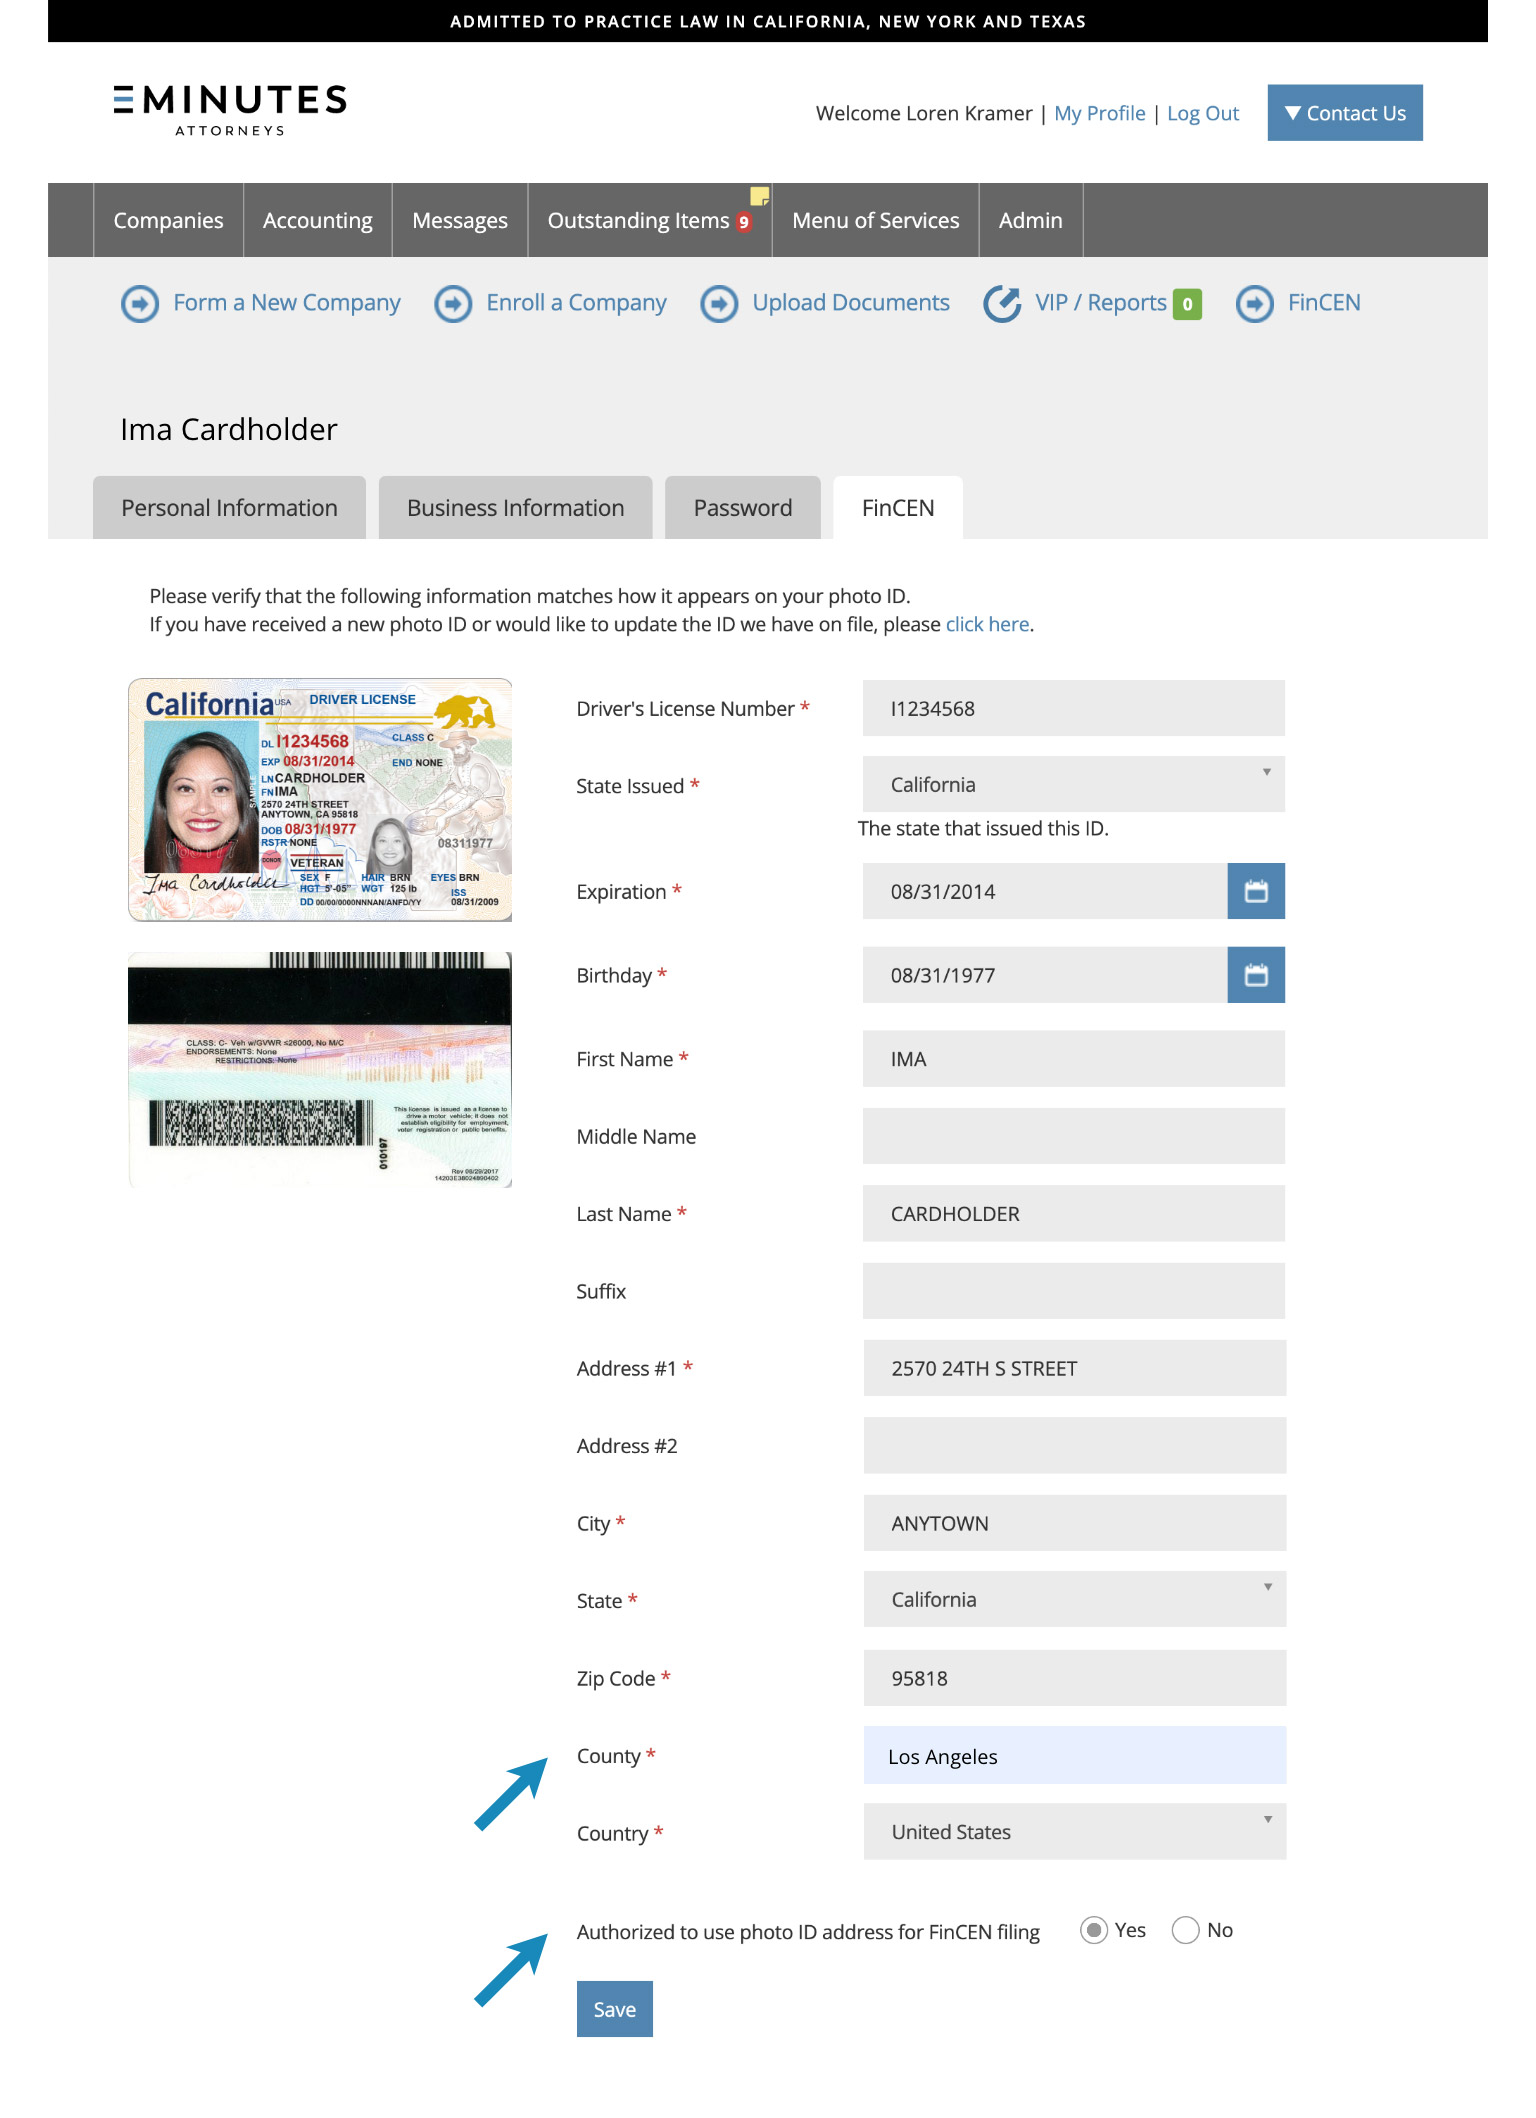
3. The system will display an image of your driver’s license with all relevant data extracted. Please add your County, and select “Yes” at the bottom of the interface to give us permission to use the address on your license for FinCen reporting.

If you do not wish to use the address on your license, please select “No”, and we will contact you to discuss options for addresses once FinCen publishes further guidance on whether the address must match the photo ID.

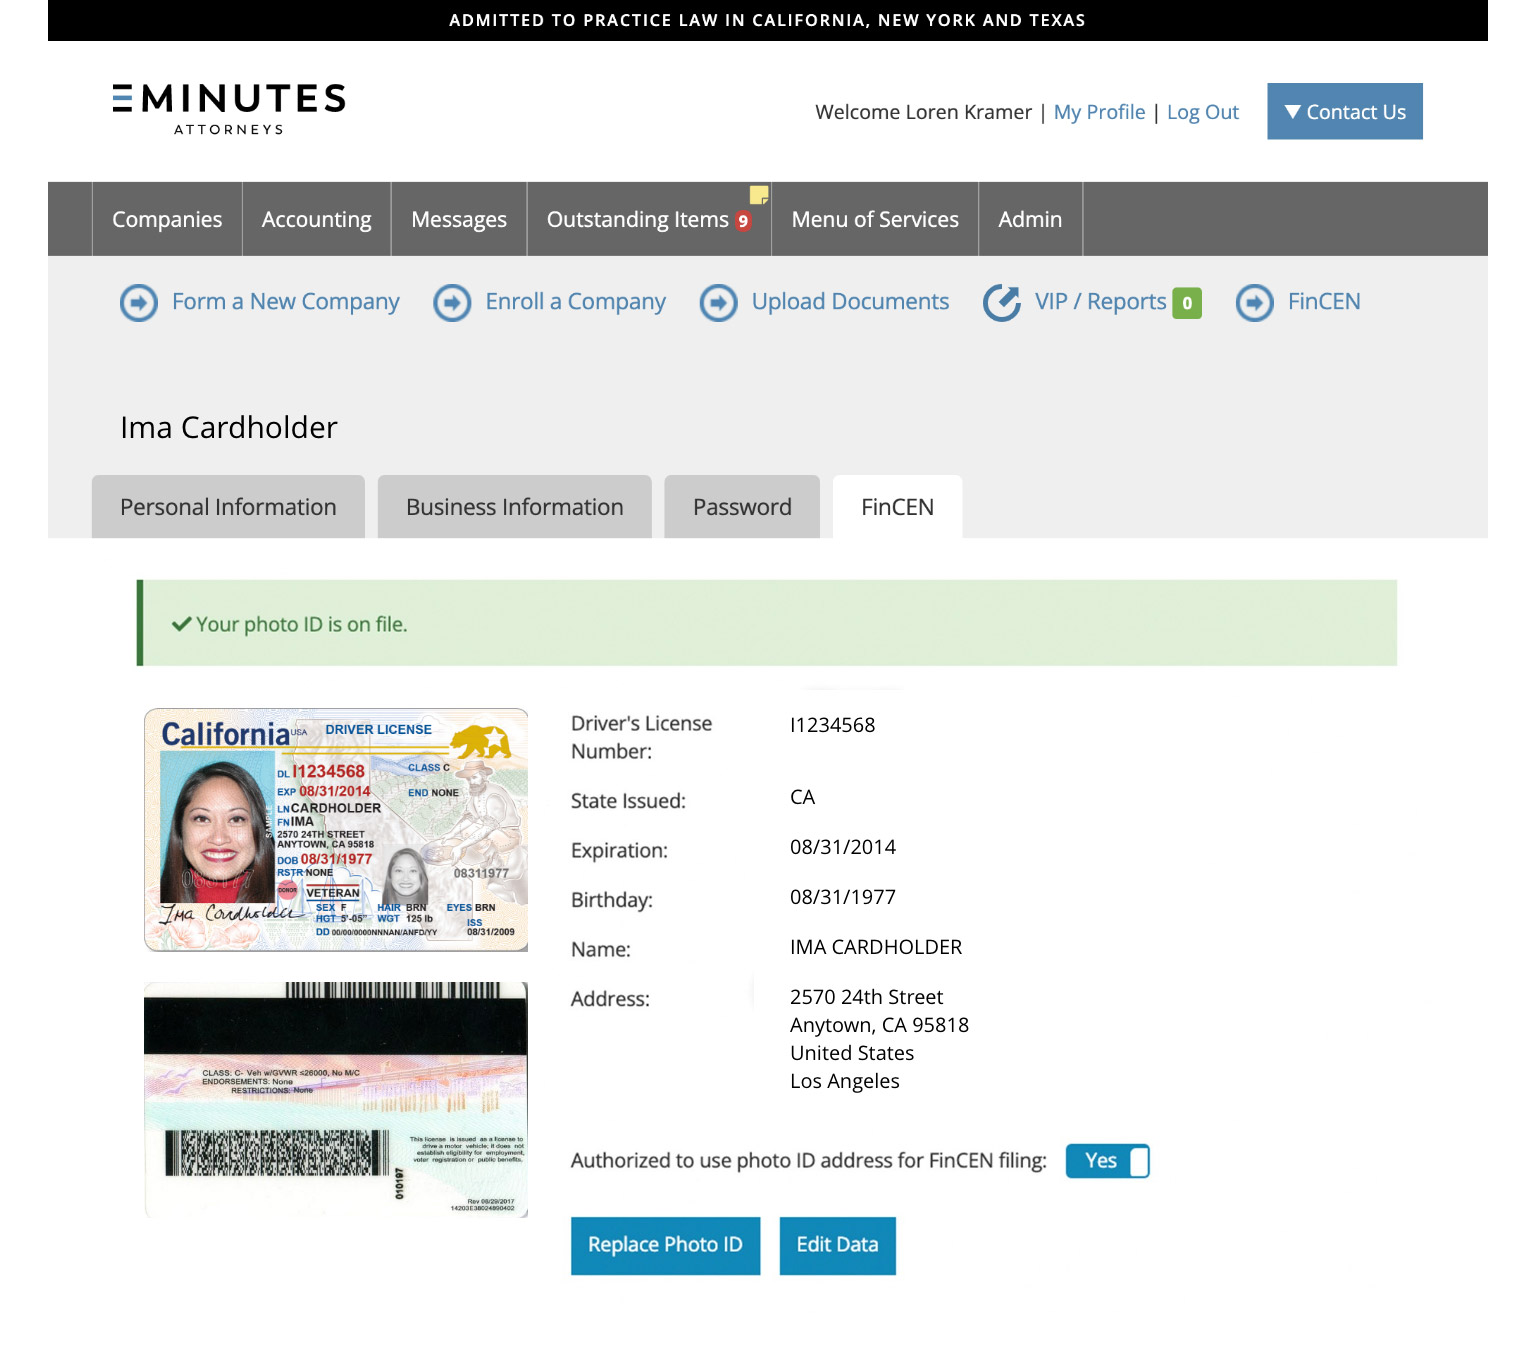
4. Confirm that your ID has been uploaded correctly.

How can I adjust my communications settings?

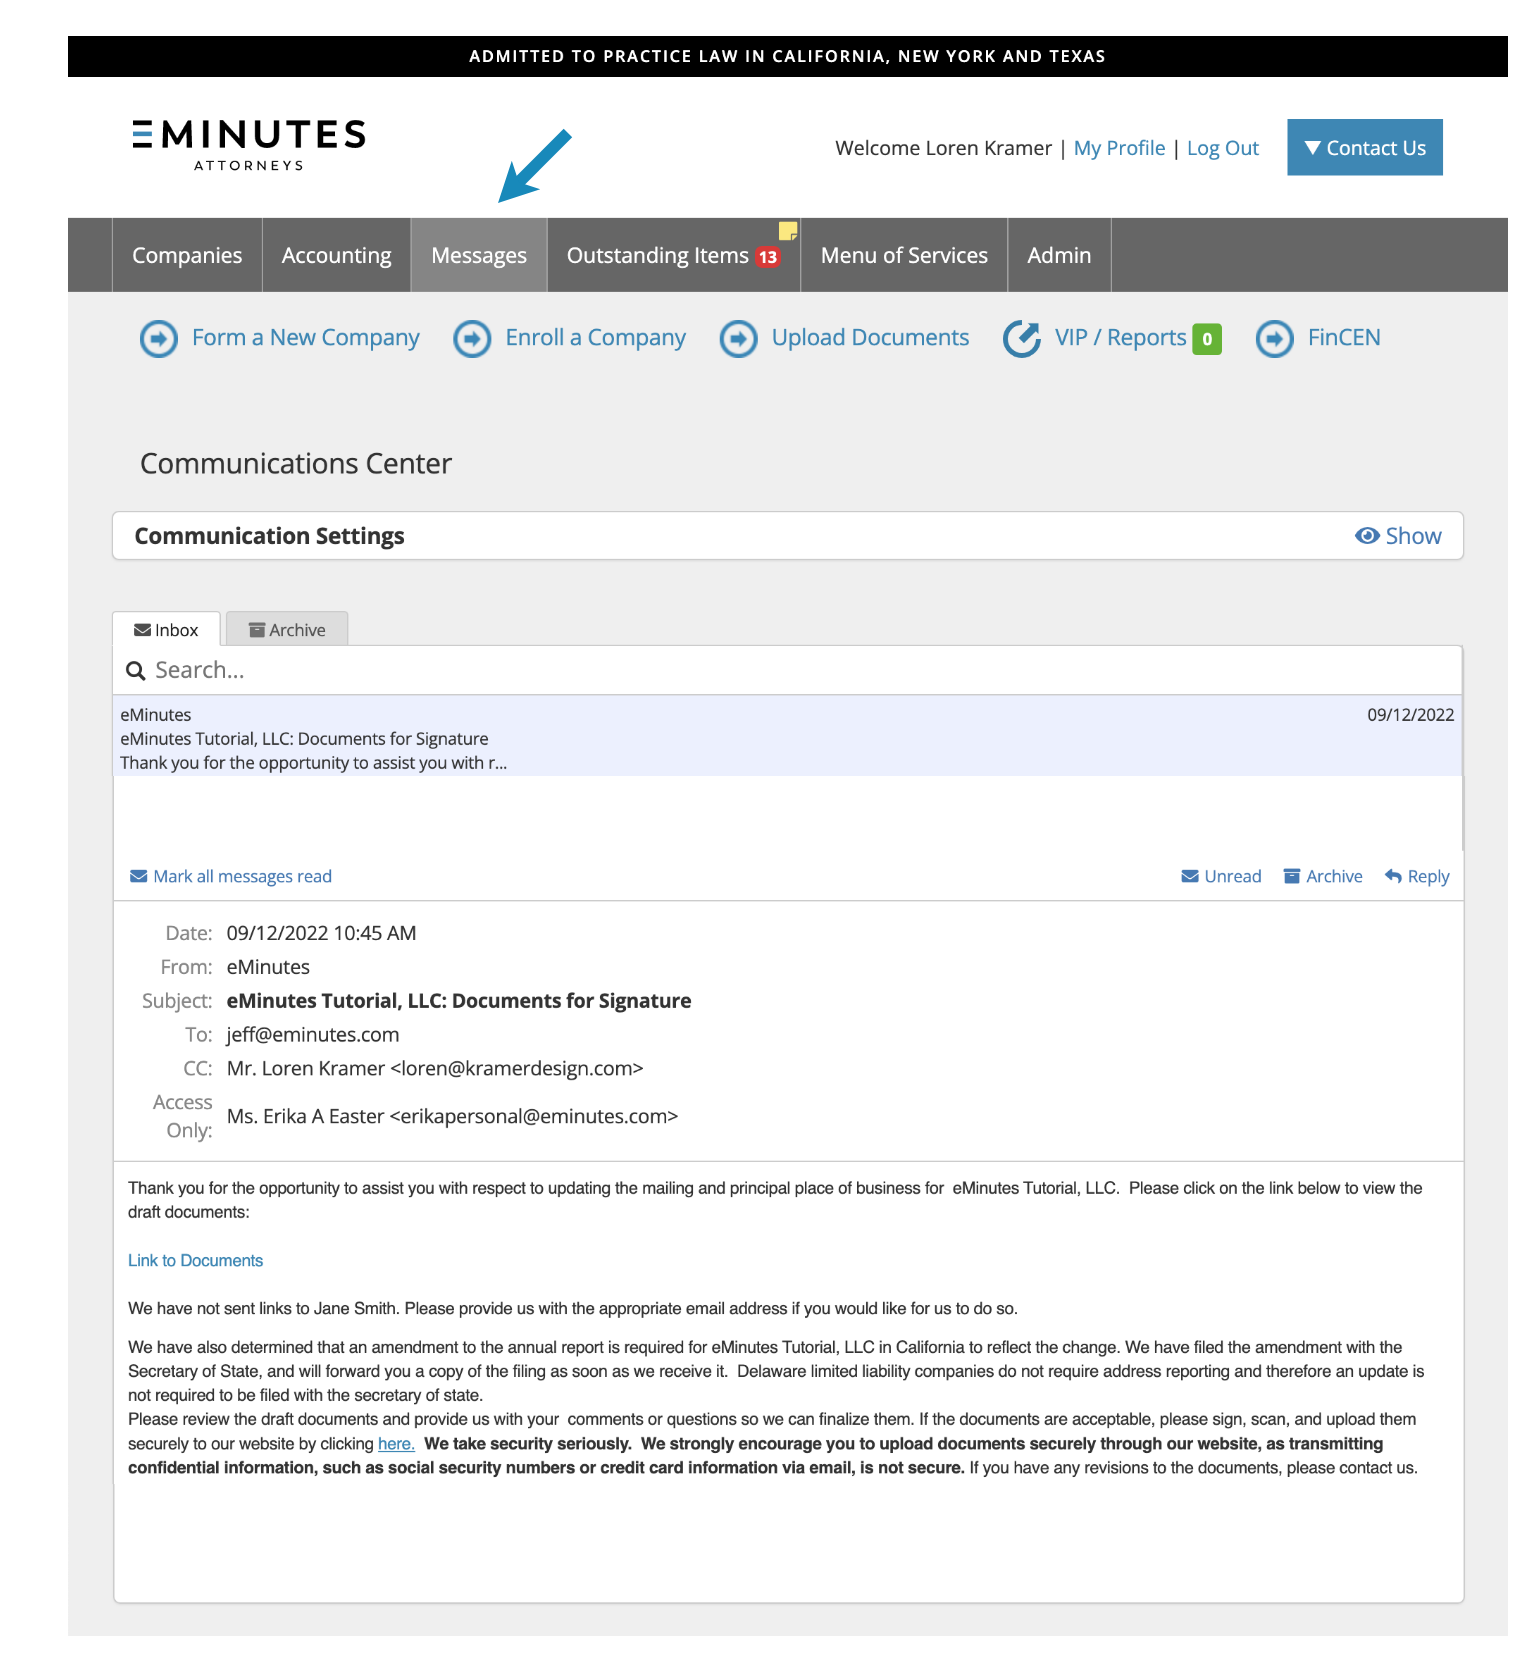
The EMINUTES Communications Center is accessible from your online portal. All communications from eMinutes are captured as messages in the Communications Center. From the Communications Center, you can control the way we communicate with you and communicate with EMINUTES securely.

Control Your Preferences

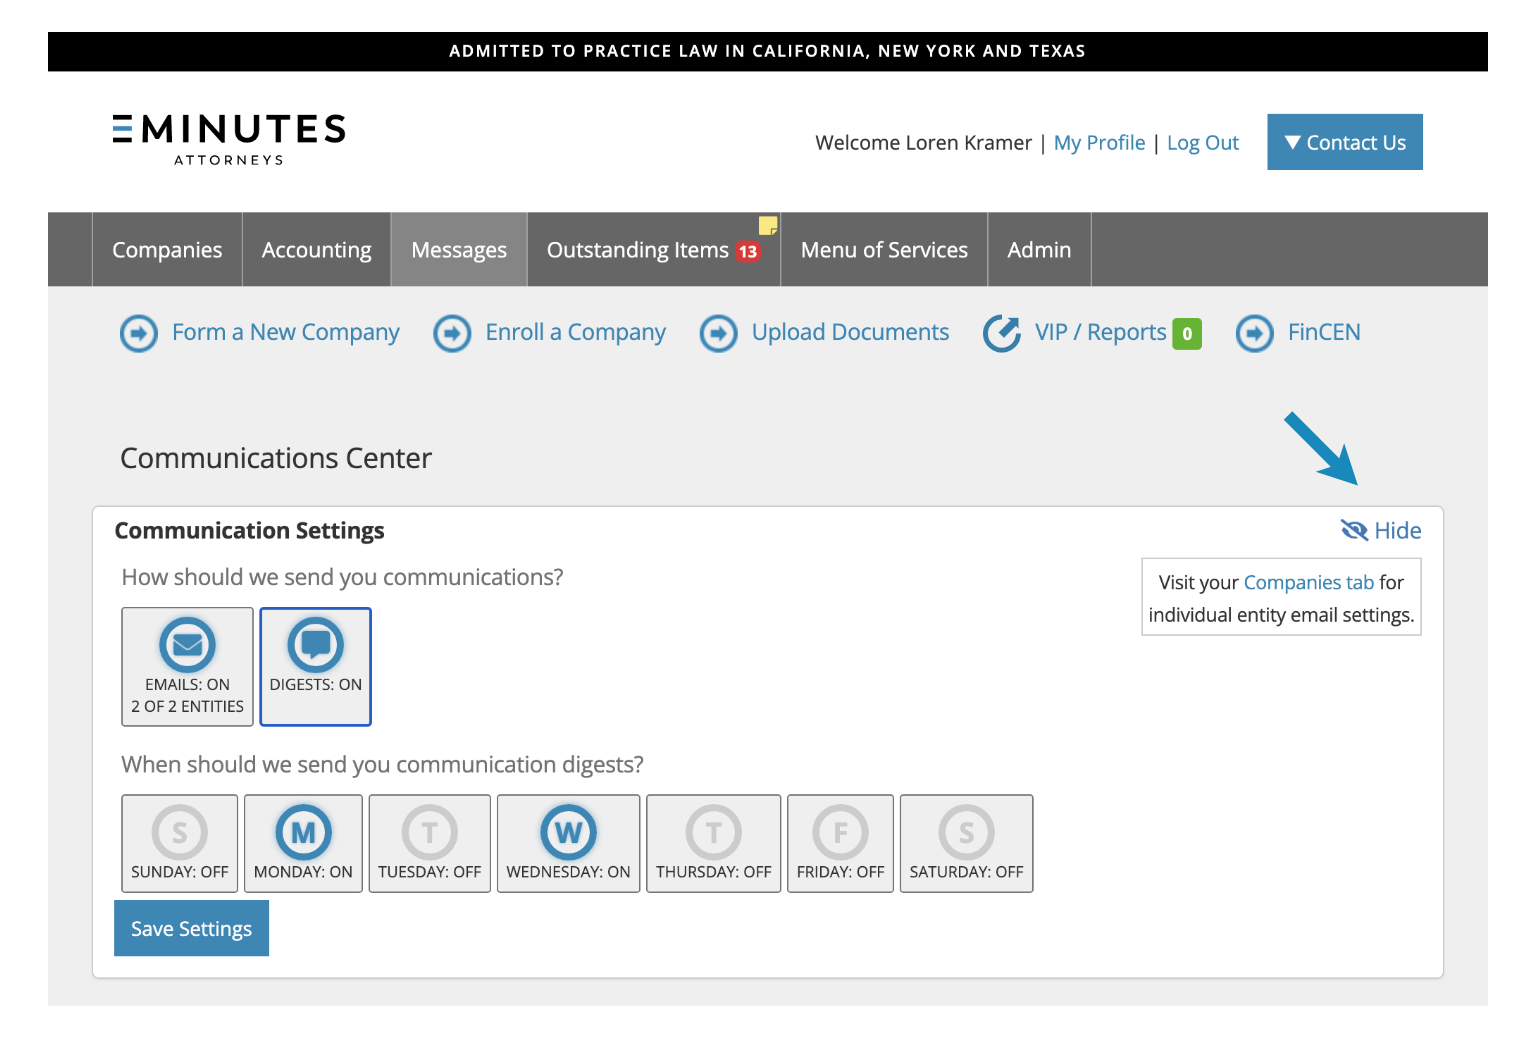
Click on “Show” in the upper right corner of the Communications Setting panel to access your preferences. eMinutes can send you individual emails or Daily Digests which include all of the day’s communications.

Use this panel to turn on/off emails and the Daily Digest. When you select Daily Digest, you can select the days of the week that you would like to receive the digest.

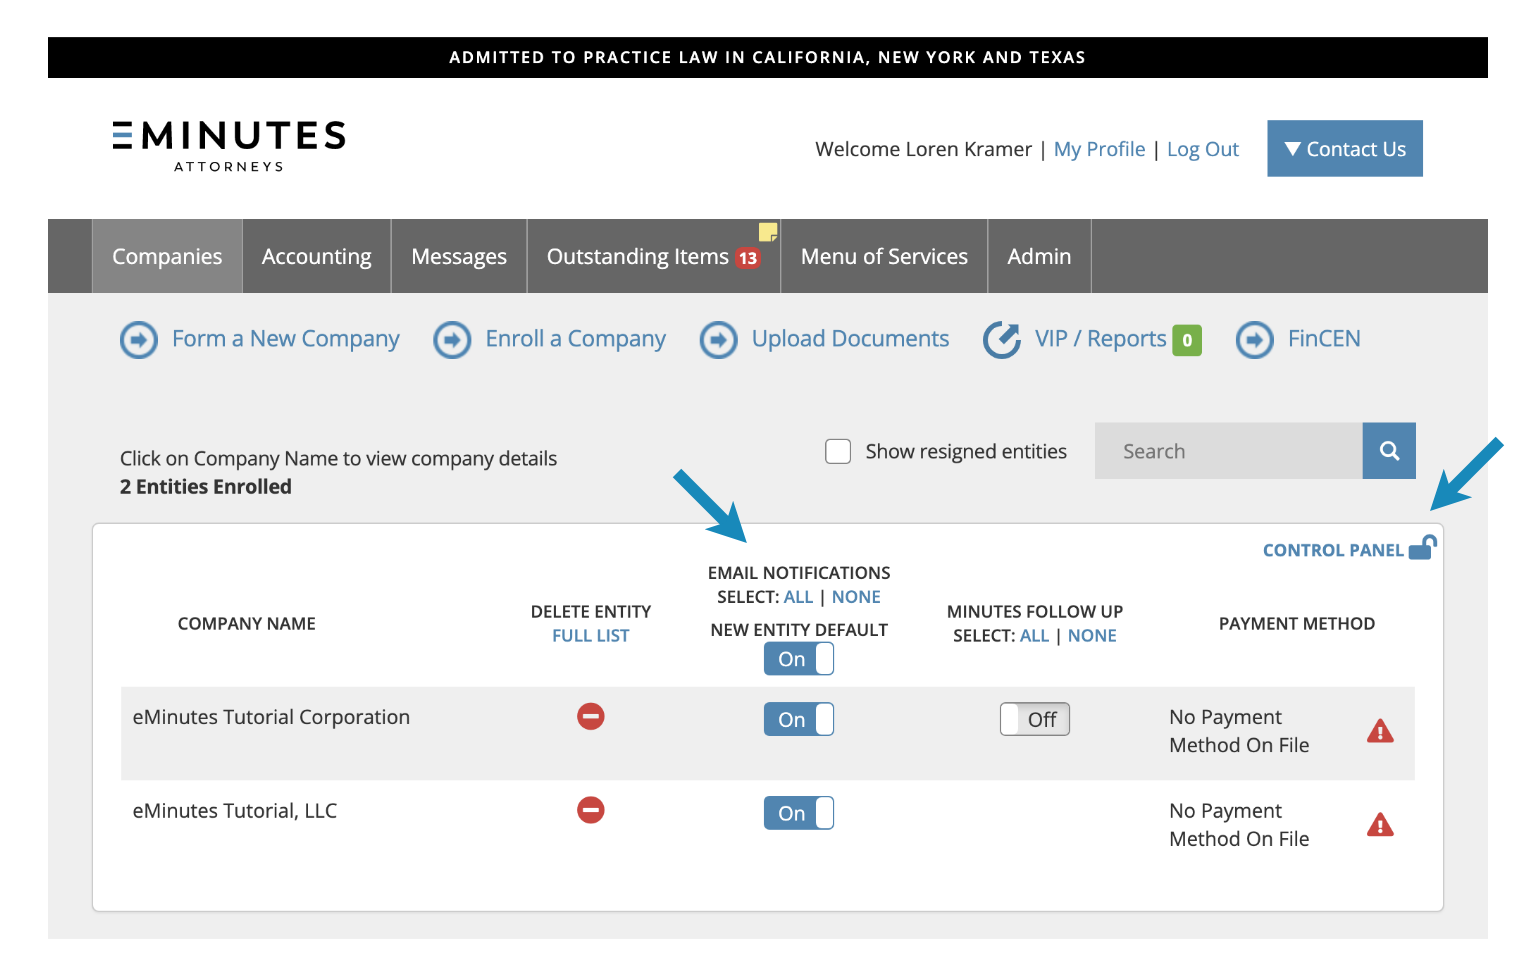
Entity-level Email Settings

You can also control your email preferences on an entity-by-entity basis. Access these email preferences by unlocking the Control Panel on the Companies tab of your portal.

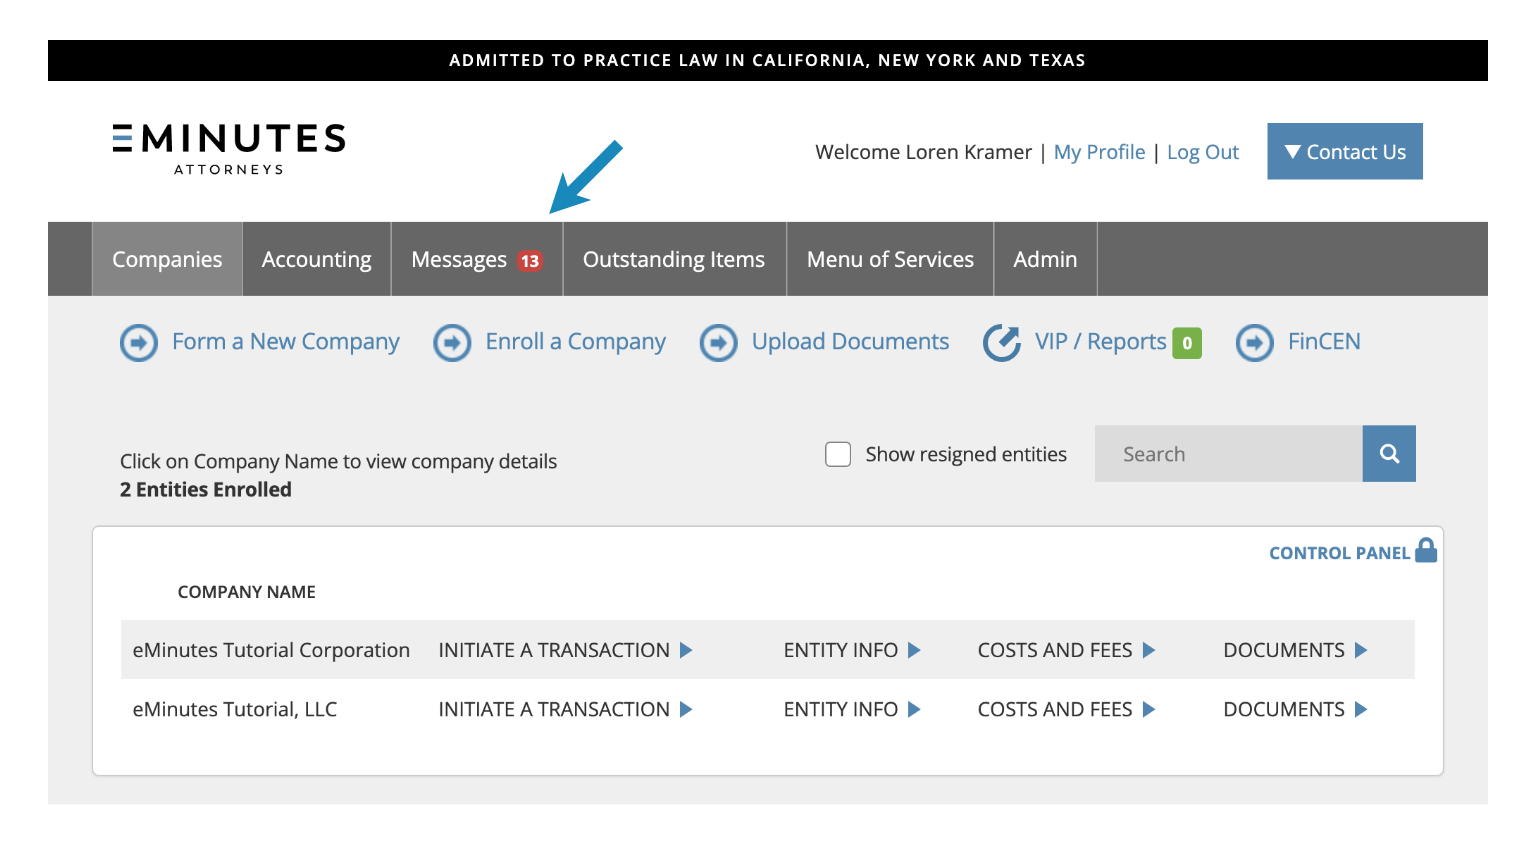
Messages Indicator

The main navigation bar in your online portal will indicate the number of unread messages in your Communications Center.

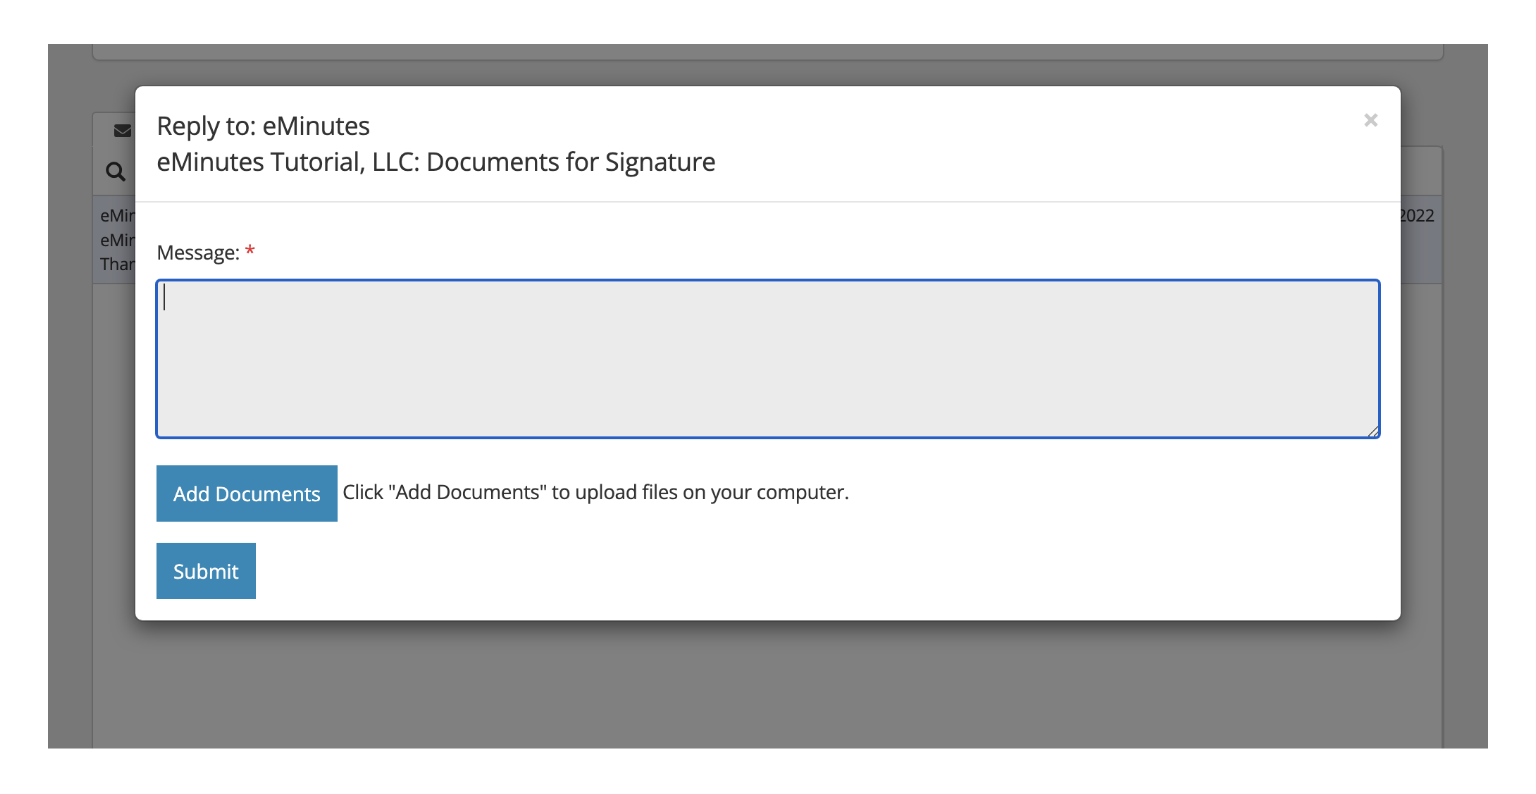
Reply and Upload Documents Securely

Replying to messages in the Communications Center is a secure way to communicate with EMINUTES team. In addition, you can securely upload documents directly to the EMINUTES servers. All data transmission to and from the our servers is secured via SSL encryption.

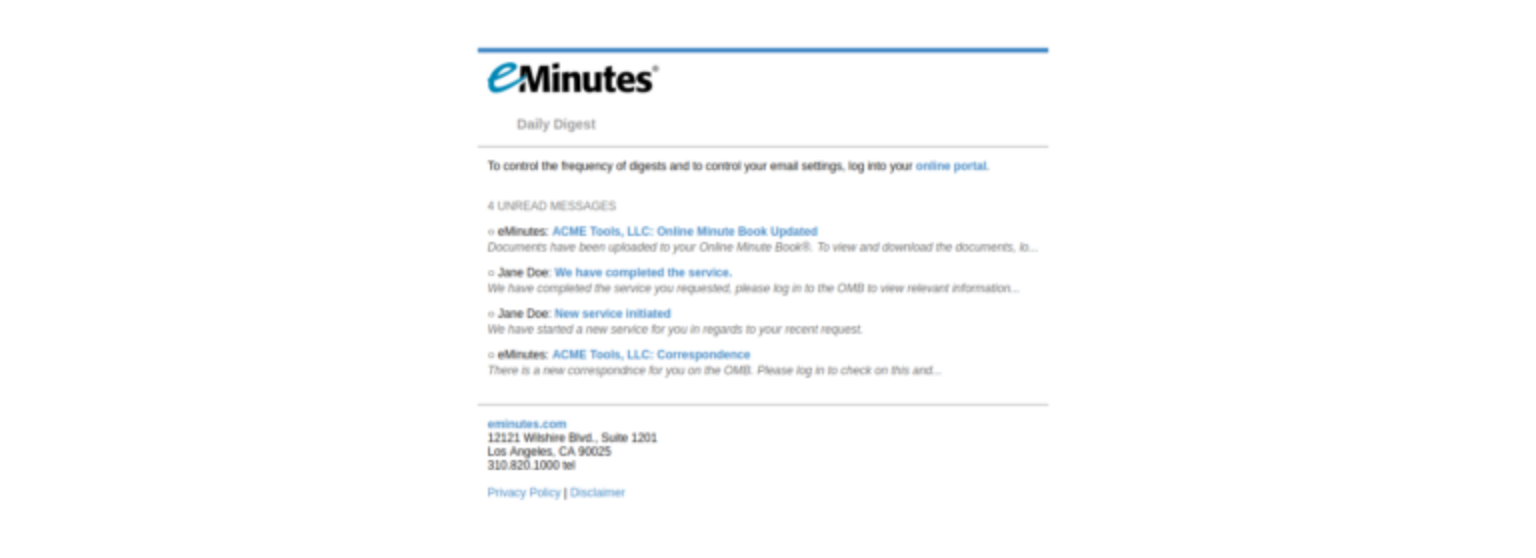
Daily Digest

The Daily Digest will summarize all communications and unread messages.